From dispatch to scene in seconds. This guide walks you through everything you need to start coordinating live response with your team.

Command Bridge runs on iOS, Android, and any web-capable device through a browser. Get the app from your device's store or open the web app, then sign in using either your email or your Google account.
Use the QR codes or links above to install on iOS, Android, or open the web app in any browser.
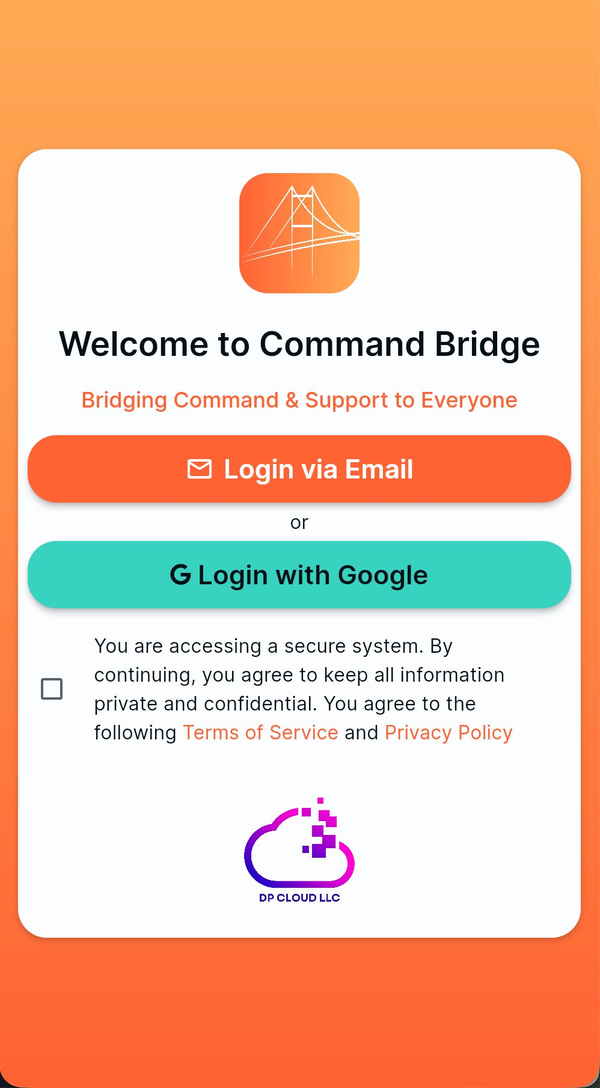
You'll be greeted by the welcome screen. Choose how you want to sign in:
Before you can sign in, check the box at the bottom to agree to the Terms of Service and Privacy Policy. You're accessing a secure system, by continuing you're agreeing to keep all information private and confidential.
After signing in, allow notifications, location, and critical alerts when prompted. These are optional but required for incident alerts and live arrival times to work fully. Your location never leaves your device, unless your department has chosen to use live location tracking and you opt-in in the settings. Even then, it is only shared during your active response.
Critical alerts overrides silent mode. When enabled, the app will alert audibly even when your phone is muted.
Command Bridge has two ways to navigate: a bottom nav bar on mobile and a sidebar menu on desktop.
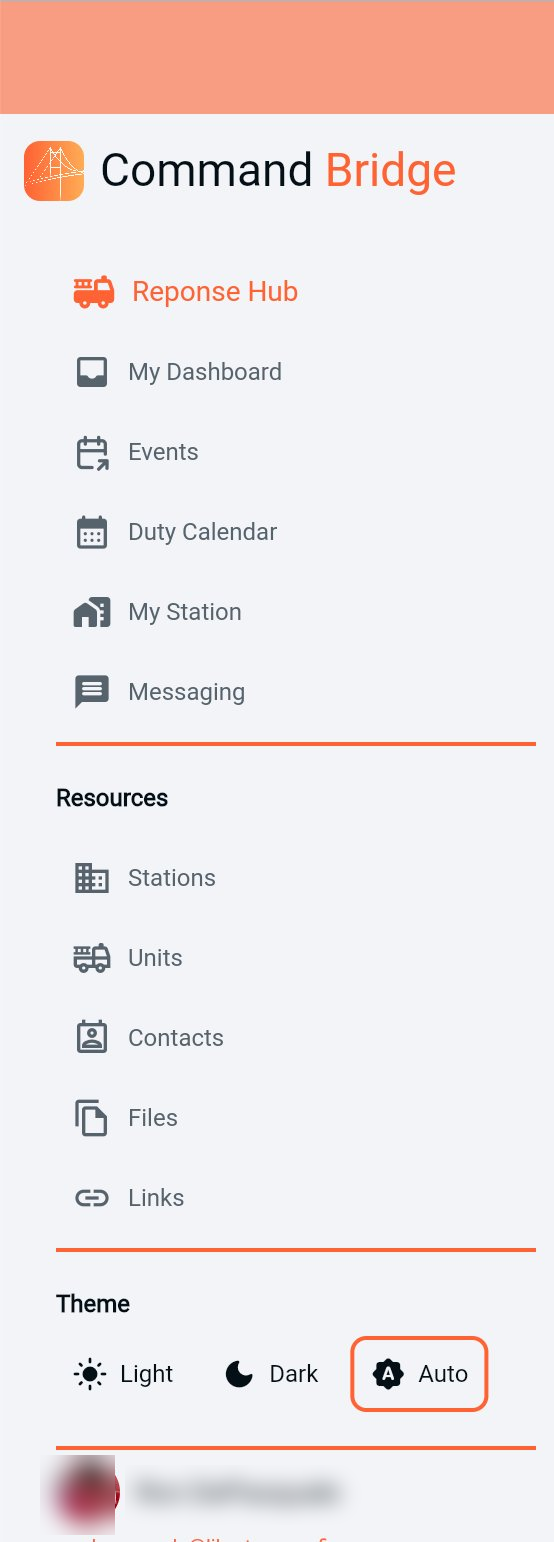
Tap the hamburger icon on mobile to open the full menu (it's always visible on desktop). From here you can reach any part of the app:
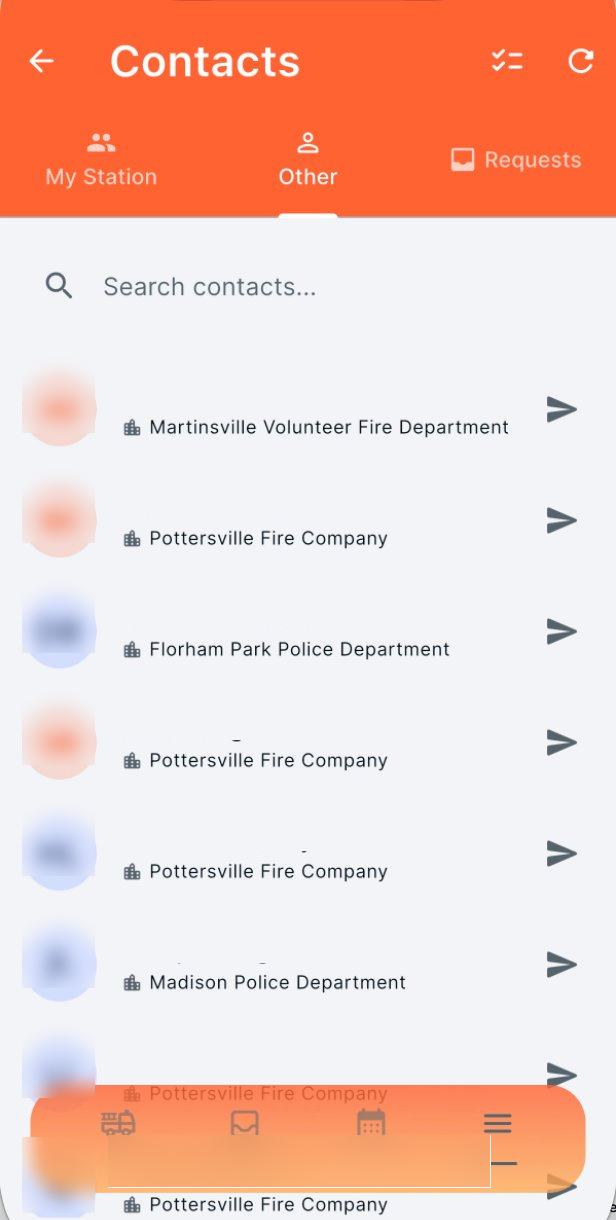
Resources section gives quick access to Stations, Units, Contacts, Files, Links, and any additional reference data you may need on a call.
Theme toggle at the bottom switches between Light, Dark, or Auto (matches your device setting).
On mobile, a persistent nav bar sits at the bottom of every screen. From left to right:
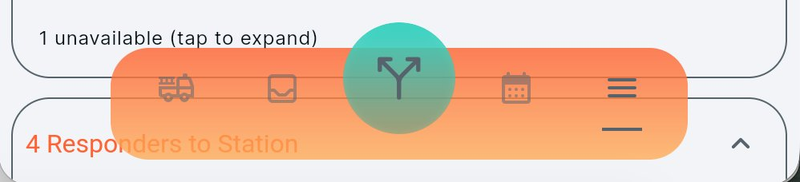
Watch for the green action button. It's the fastest way to update your status, complete an incident, or take other context-specific actions without digging through menus.
The Response Hub is your main landing screen. It shows incidents from every station you're a member of, with two tabs at the top: Active Incidents for live calls and Past Incidents for history.
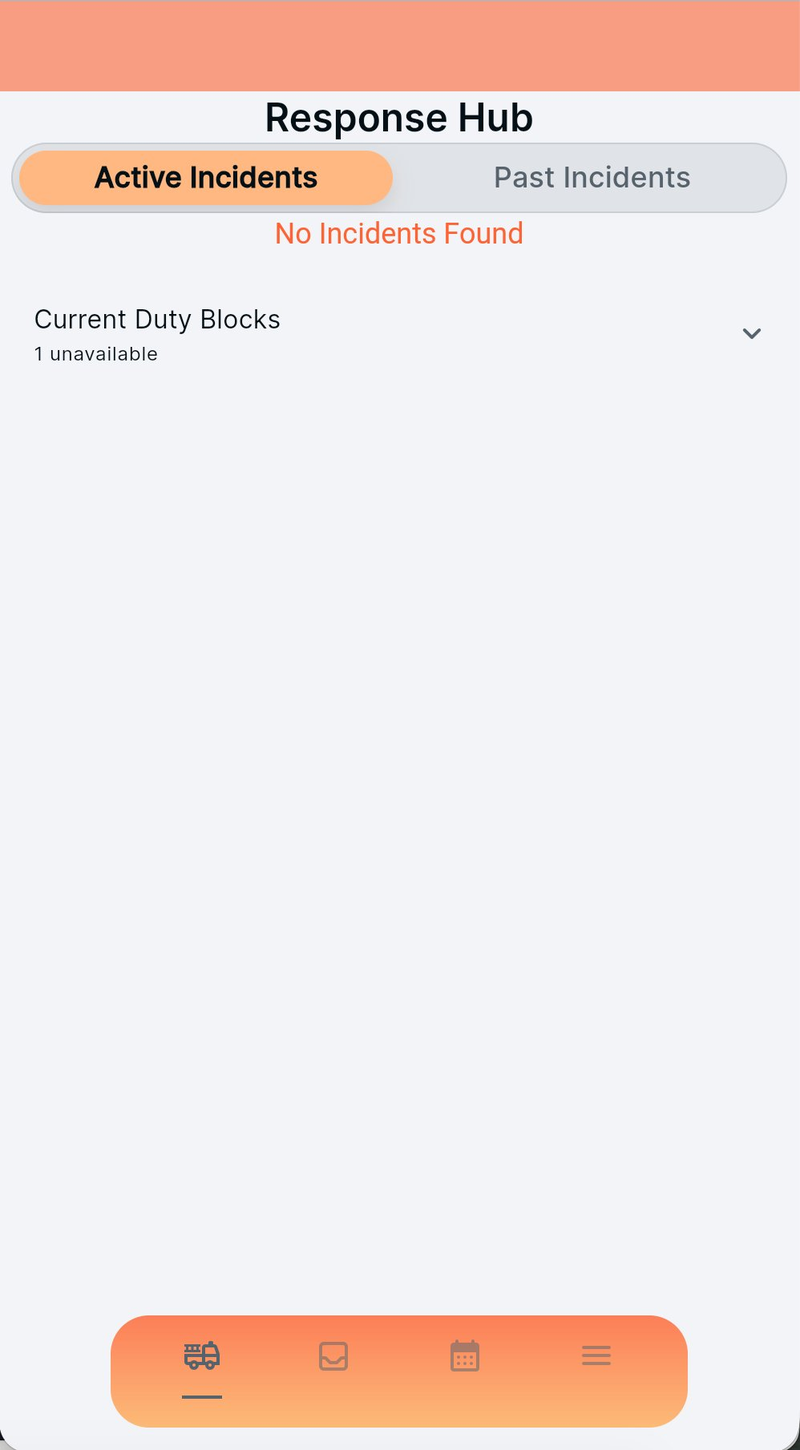
This is the default view. When a call comes in, it appears here in real time with full CAD data. When there are no active calls, you'll see No Incidents Found, the calm before the storm.
Current Duty Blocks is a collapsible panel that shows who's currently unavailable across your stations. Tap the chevron to expand it and see who's out and why.
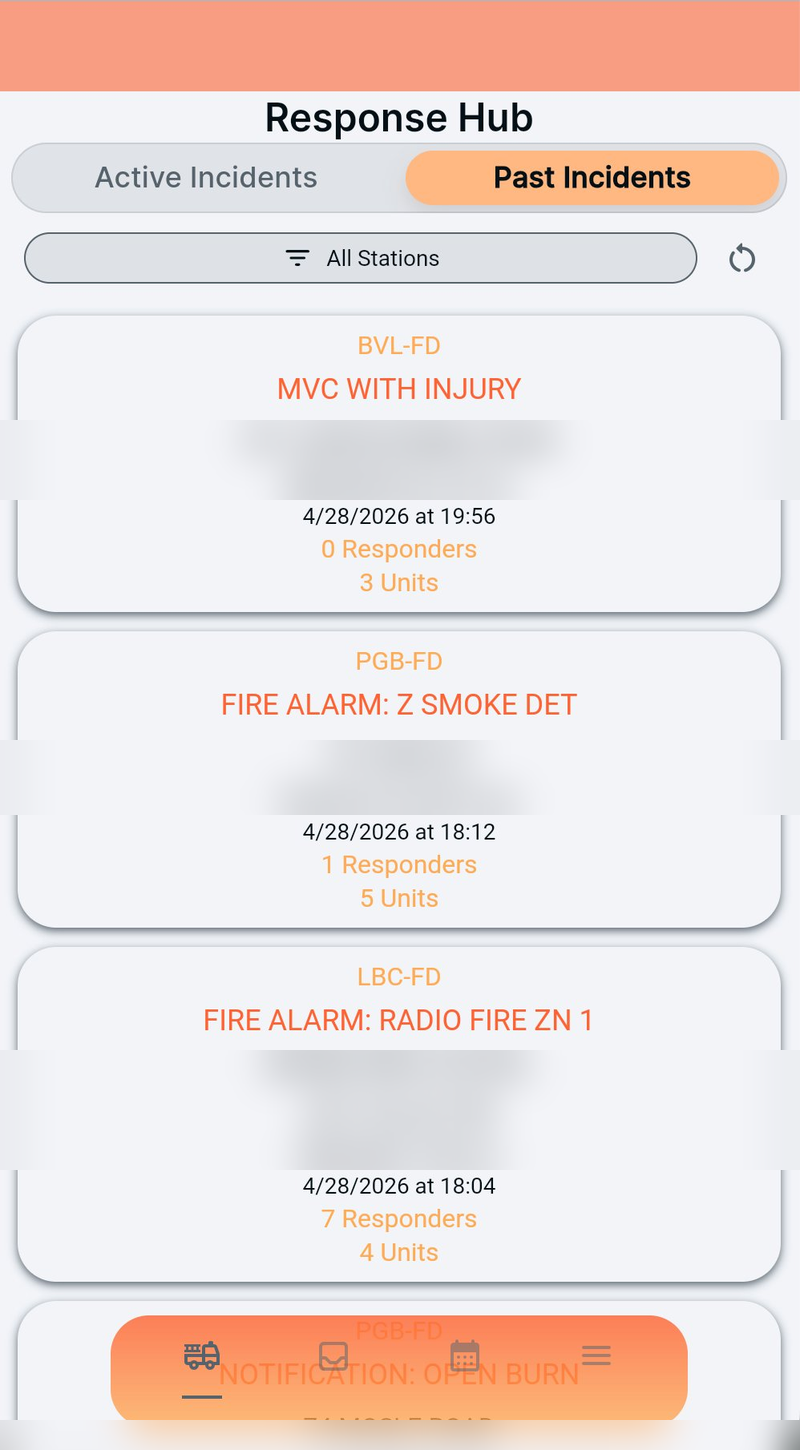
Switch tabs to review recent call history. Each card shows:
Use the station filter at the top to narrow the list to a specific department, or hit the refresh icon to pull the latest. Tap any incident to open its full detail view.
If you keep the Response Hub open, for example on a station-room display, new incidents will automatically open to the detail page when they come in, and return to the main hub once the call is completed. No interaction required.
Tap any incident to open its full view. Everything you need to respond is here: live CAD notes, responder list, units dispatched, and a map with hydrants and access points.
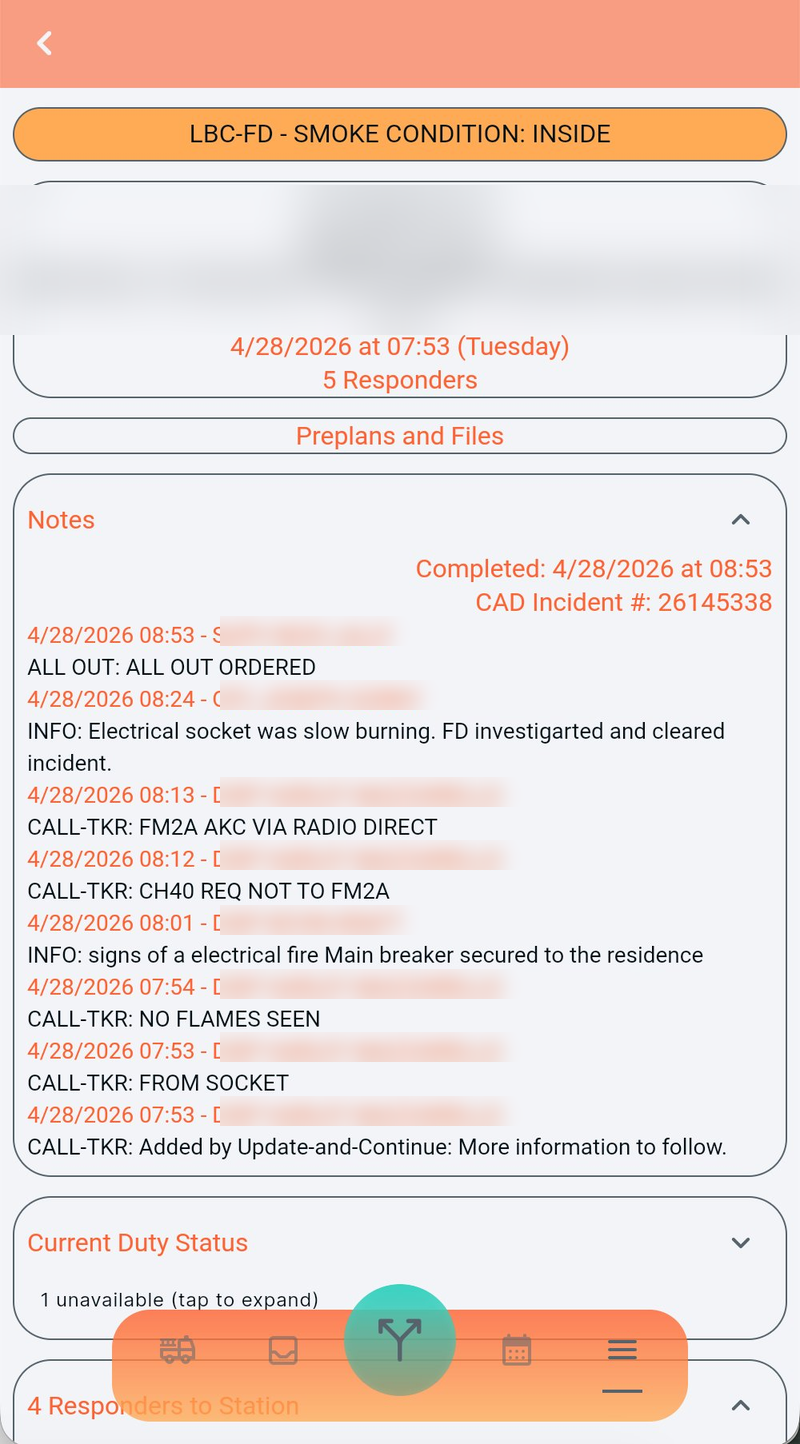
The Notes section streams live updates from dispatch. Each entry shows the timestamp, the dispatcher or officer who logged it, and the content: call-takers, info updates, status changes, all of it. Names are blurred in this guide for privacy.
At the top you'll see the CAD Incident # and the completion timestamp once the call is closed. The Preplans and Files button jumps straight to building plans, hazard info, and any documents attached to that location.
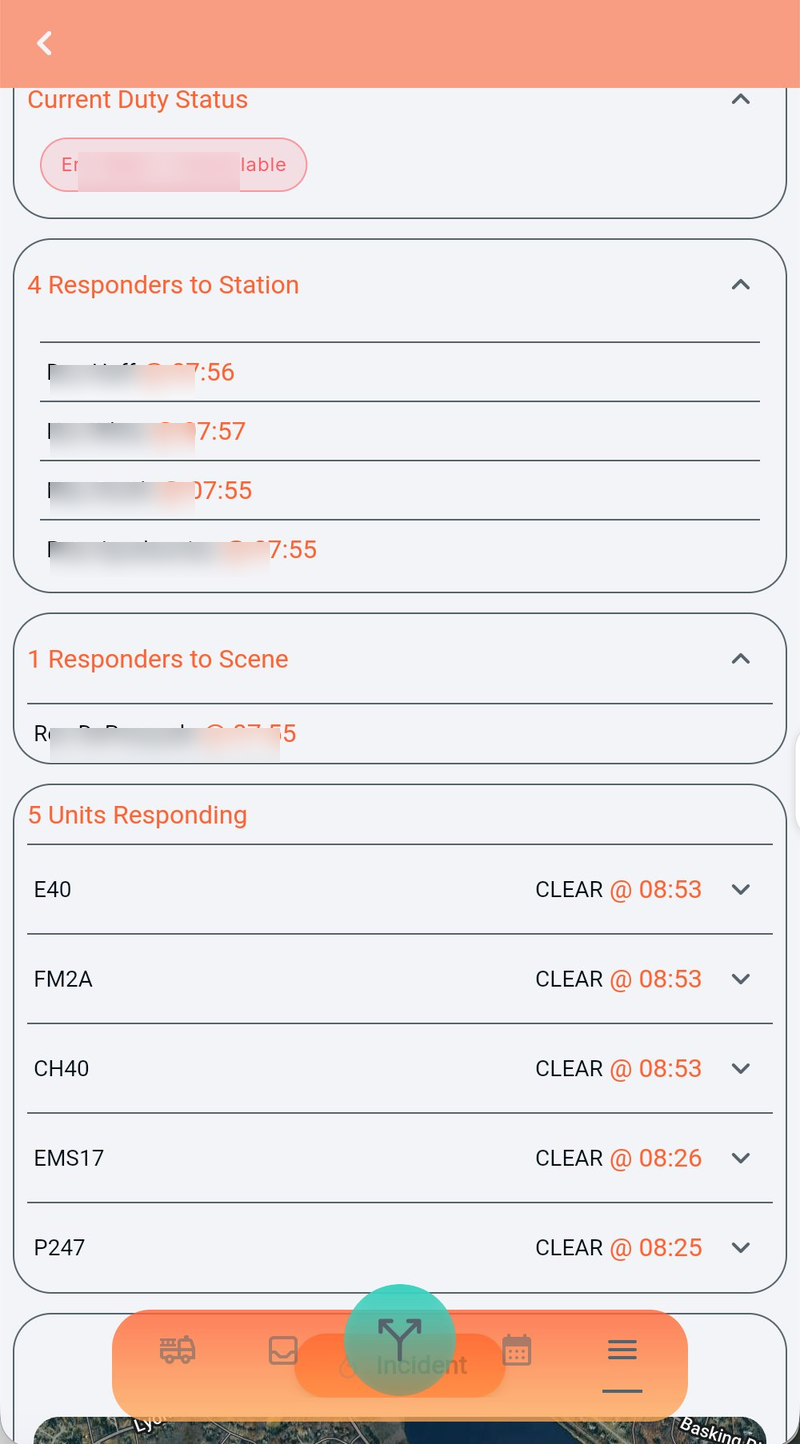
Scroll down to see who's coming and what's rolling:
Each section is collapsible. Tap the chevron to expand or hide.
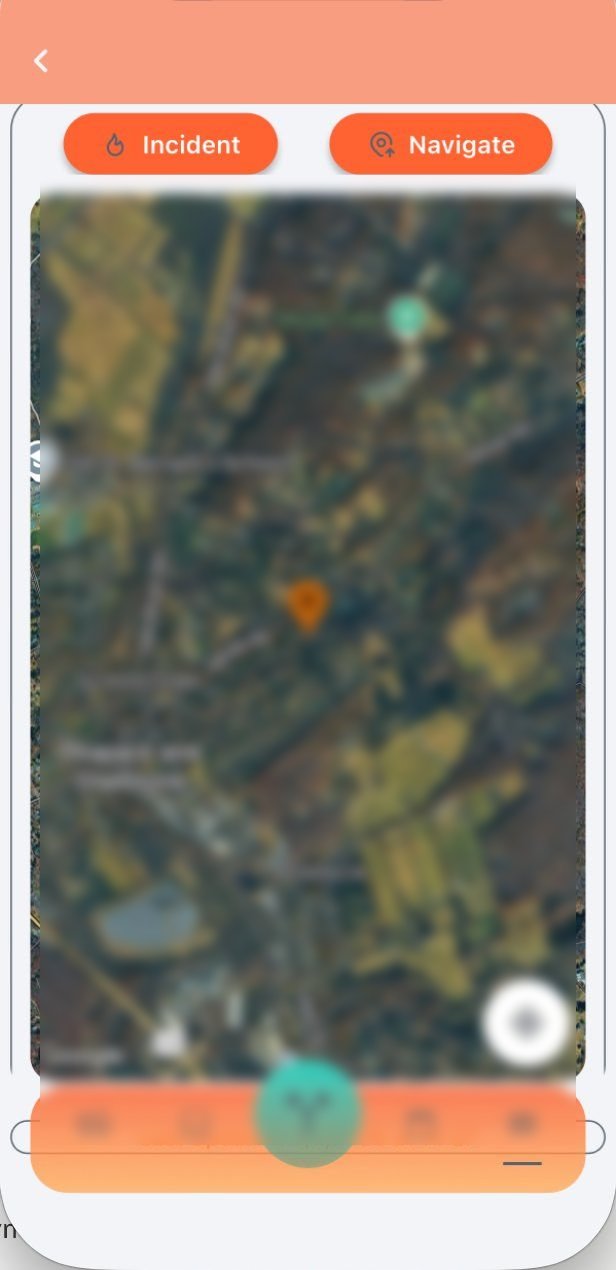
Every incident has an embedded map pinned to the call location. Two buttons sit at the top:
Depending on what your agency has configured, the map can also display:
Pinch to zoom, drag to pan, and use the recenter control (bottom right of the map) to jump to your current location. The Last Updated timestamp at the bottom of the page shows when the CAD data was last refreshed.
Command Bridge does not store or transmit your physical location. When GPS is enabled, the app calculates the route to the incident or station locally on your device and only sends back the resulting arrival time. Your raw coordinates never leave your phone.
When an incident hits, tap the alert to open it. Inside the incident detail view, the green action button in the bottom nav opens a context-aware bottom sheet. The options shift depending on whether you've started responding yet.
Tap the push notification, or open the incident from the Active Incidents tab in the Response Hub.

Before you've started responding, the action sheet offers:
Available options are role and permission based. What you see depends on your role in your department. Officers and admins may see additional options like Reopen Incident.
Use the Navigate button at the top of the incident map to launch turn-by-turn directions in your device's default maps app.
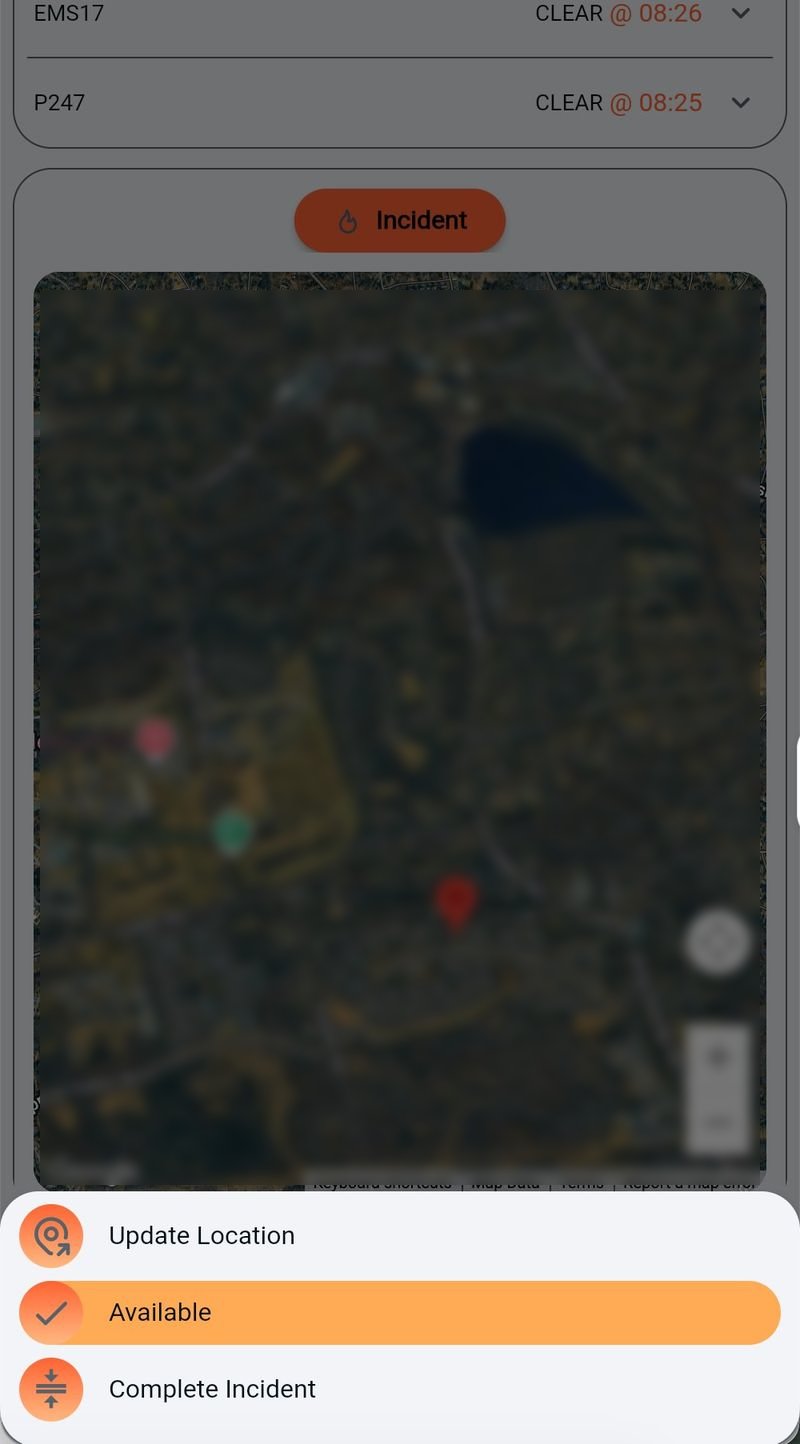
Once you've chosen Respond to Station or Respond to Scene, tapping the green action button again offers a different set of options:
Your name appears in the responder list with your calculated arrival time (for example, "@ 07:55"). When that time is reached, the entry automatically flips to Arrived. No tap required, no continuous location monitoring.
Arrival times are calculated on your device and only the resulting status is shared. Your physical location is never stored or transmitted by Command Bridge.
Open any incident to see preplans, hydrant locations, and other tactical info layered on the map. Know what you're walking into before you arrive.
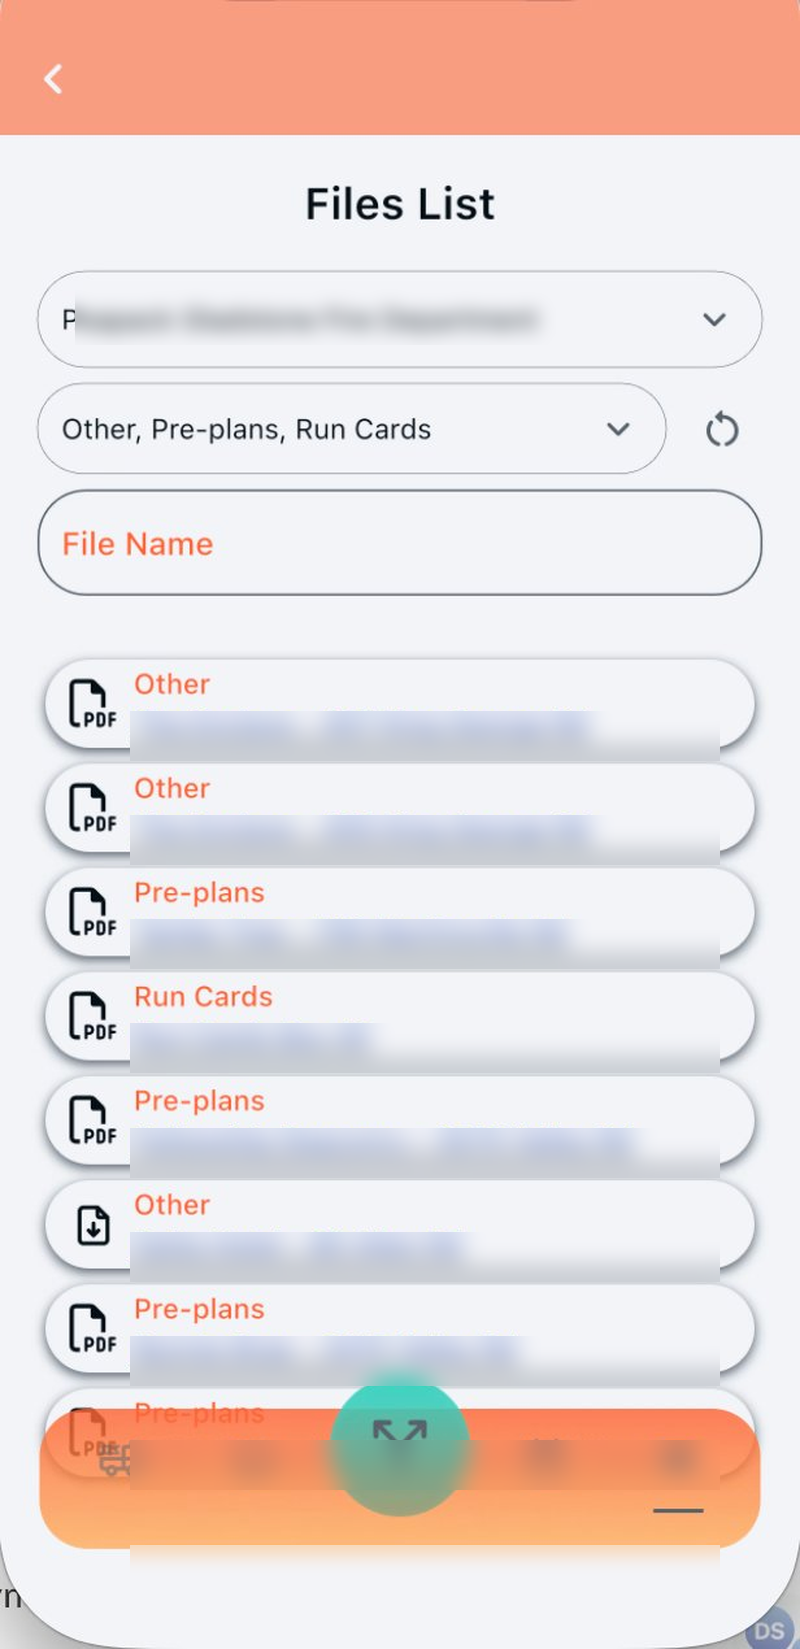
From the sidebar, tap Files under Resources to open the full document library for your department. Use it on or off a call.
Each entry shows its category label and links to the PDF. Tap any file to open it. Department names and addresses are blurred in this guide for privacy.
Preplans are editable from the field. If you spot something out of date, like a moved hydrant or a new gate code, update it on the spot so the next crew has accurate info.
Messaging is currently in beta testing and will be released soon. Some features and screens may change before general release.
Communicate securely with your crew, mutual aid partners, and key stakeholders without sharing personal phone numbers. All messages are encrypted.
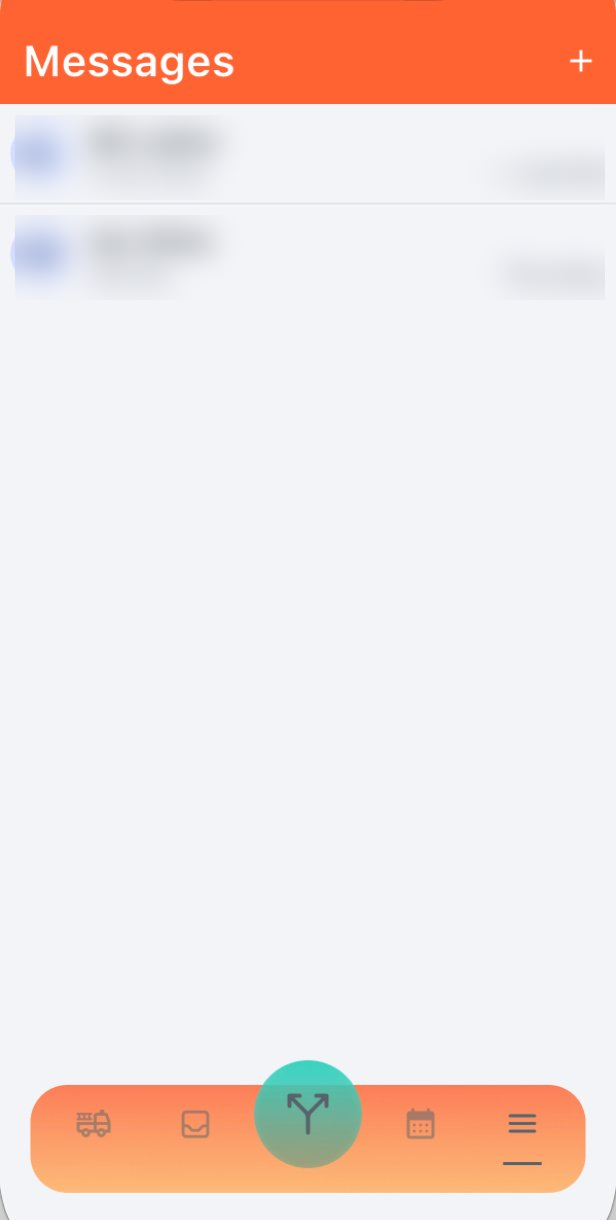
The Messages screen shows all your active threads. Tap any conversation to open it. Use the + button at the top right to start a new direct message or group chat.
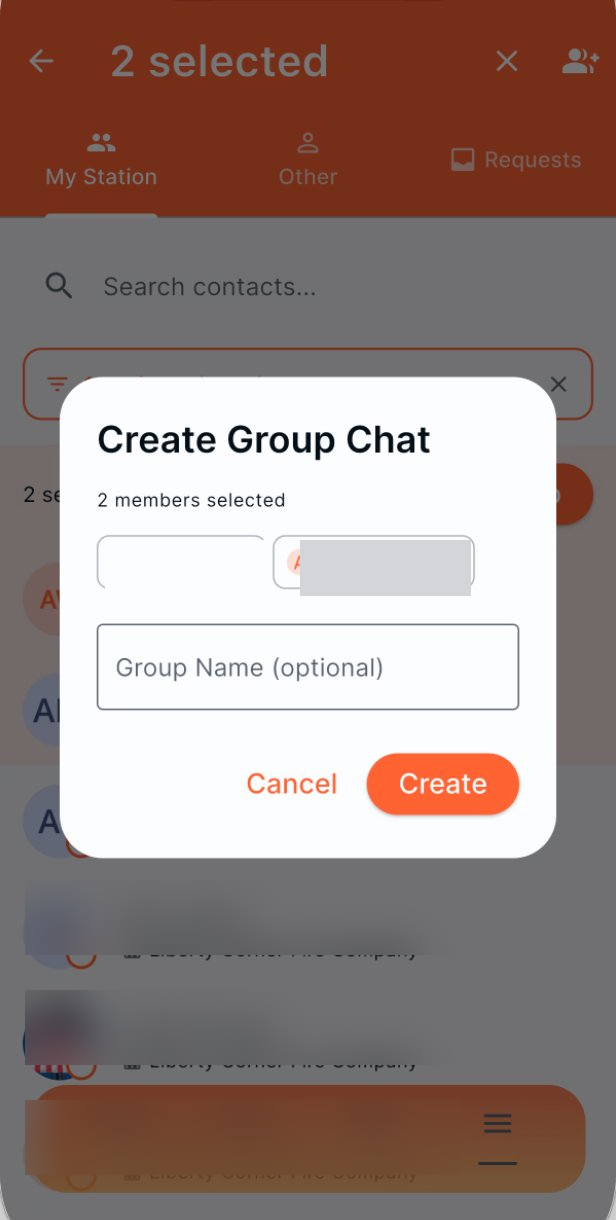
From the contacts picker, select two or more members and tap to create a group. The Group Name field is optional. Leave it blank for a default name based on members, or set a custom one (like "B Shift" or "Truck 4 Crew").
Three tabs organize who you can reach:
To message someone outside your station, you'll send a request first. They have to accept before the conversation can begin. This prevents unsolicited contact.
Track shifts, availability, training, drills, and department events. Sync events to your phone's native calendar.
The Duty Calendar tracks who is On Duty, Off Duty, or Unavailable across your stations. Three views, all from the same data:
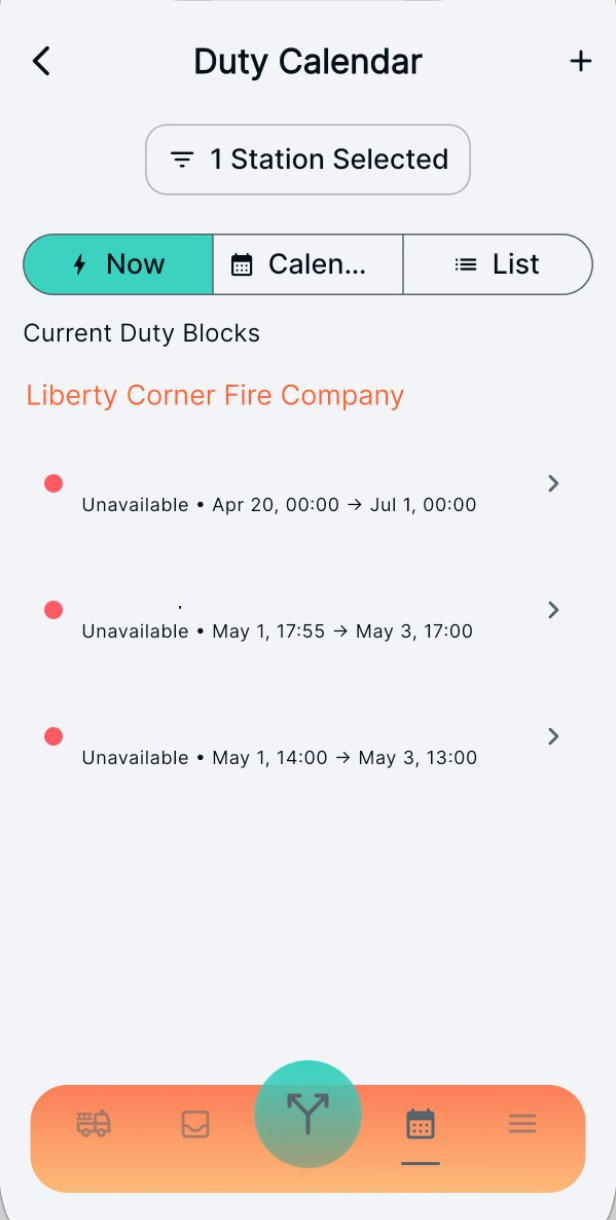
The Now tab shows currently active duty blocks. At a glance, see who is unavailable right now and how long their block runs. Tap any entry to view or edit it.

A traditional month grid. Tap any day to see the duty blocks for that date. Use the prev/next arrows or the month picker to jump around.
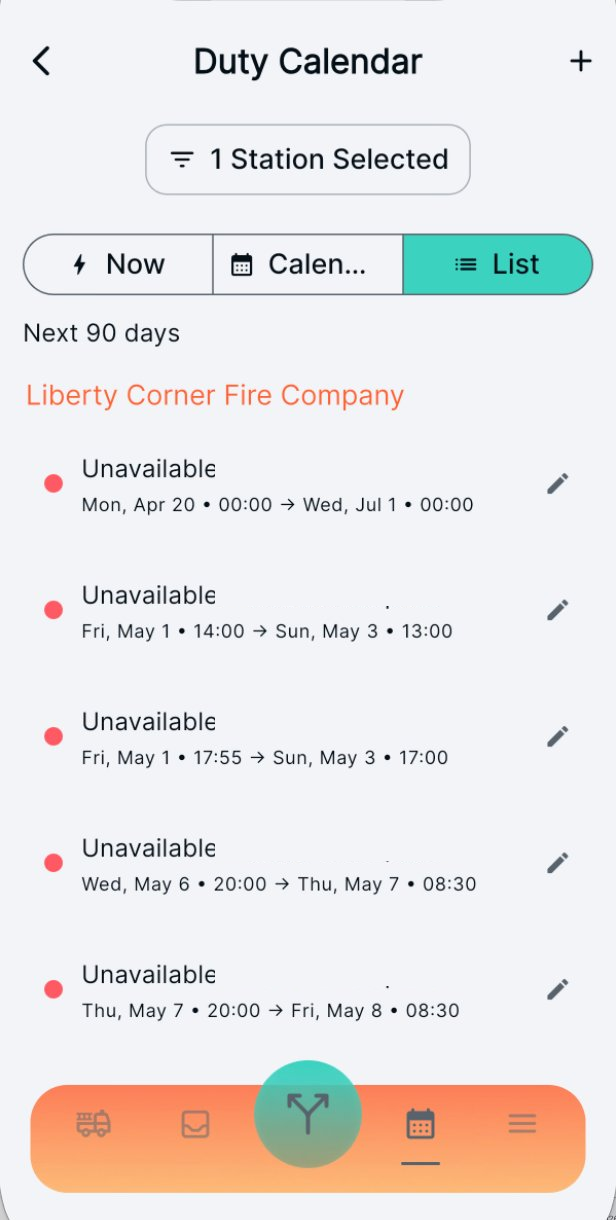
A linear timeline of the next 90 days of blocks across all your stations. Each entry shows the status, date range, and times. Tap the pencil to edit.
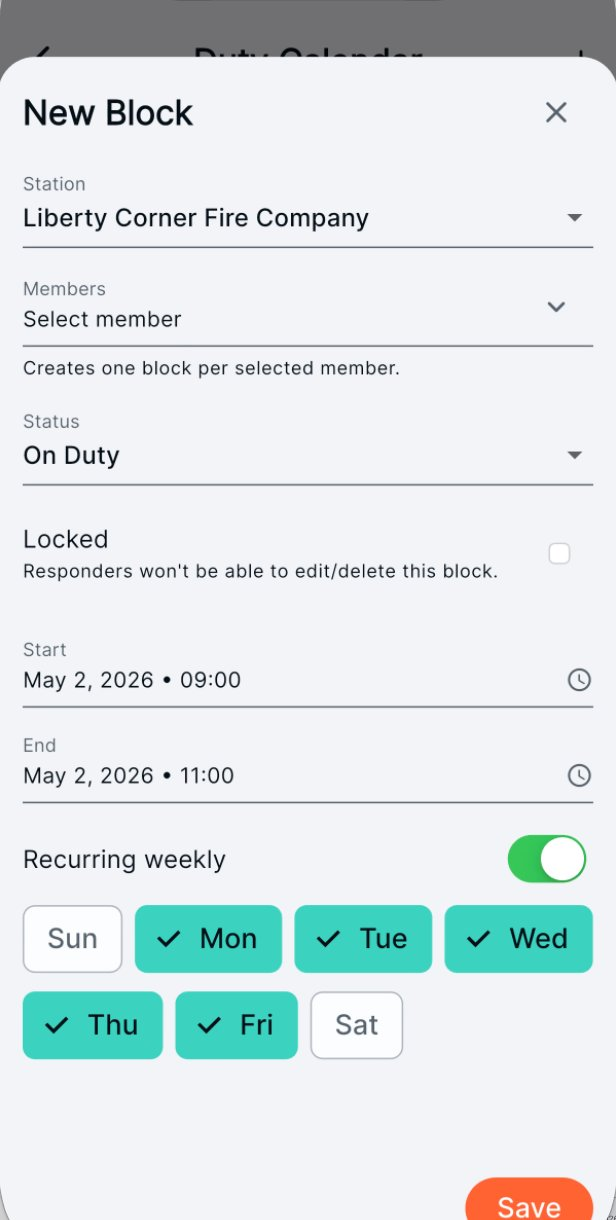
Tap the + button at the top right of any view to create a new block. The dialog supports:
Department events live alongside duty blocks: drills, meetings, fundraisers, community events, and more.
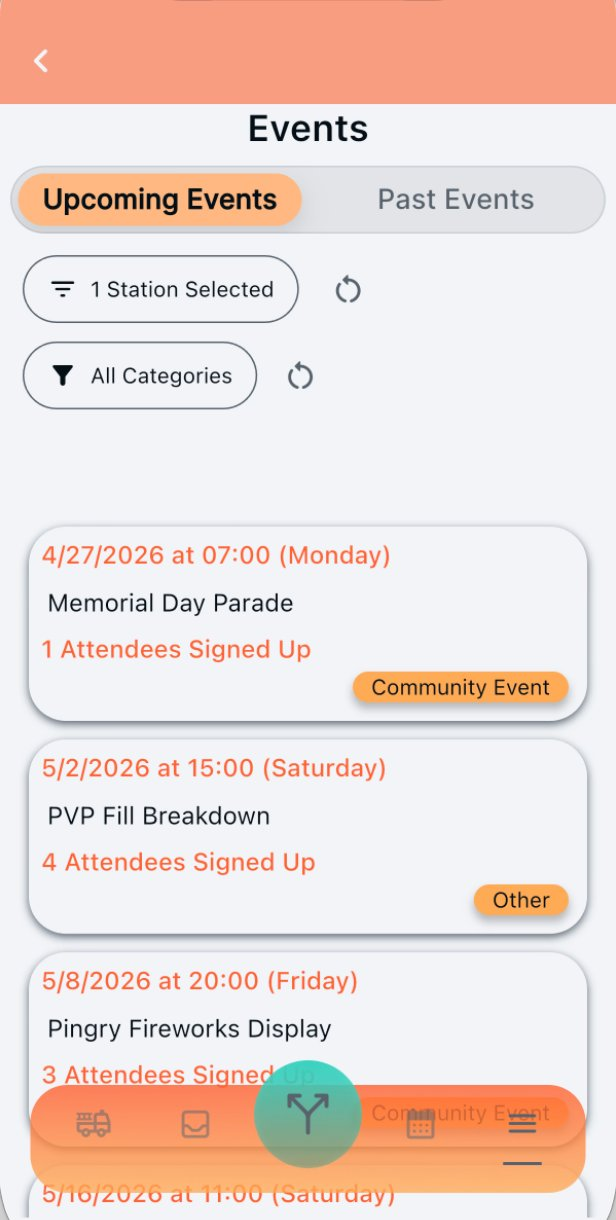
Two tabs separate Upcoming Events from Past Events. Each card shows the date, time, name, attendee count, and a category badge.
Use the Station and Categories filters at the top to narrow the list. Tap any event to open its full detail.
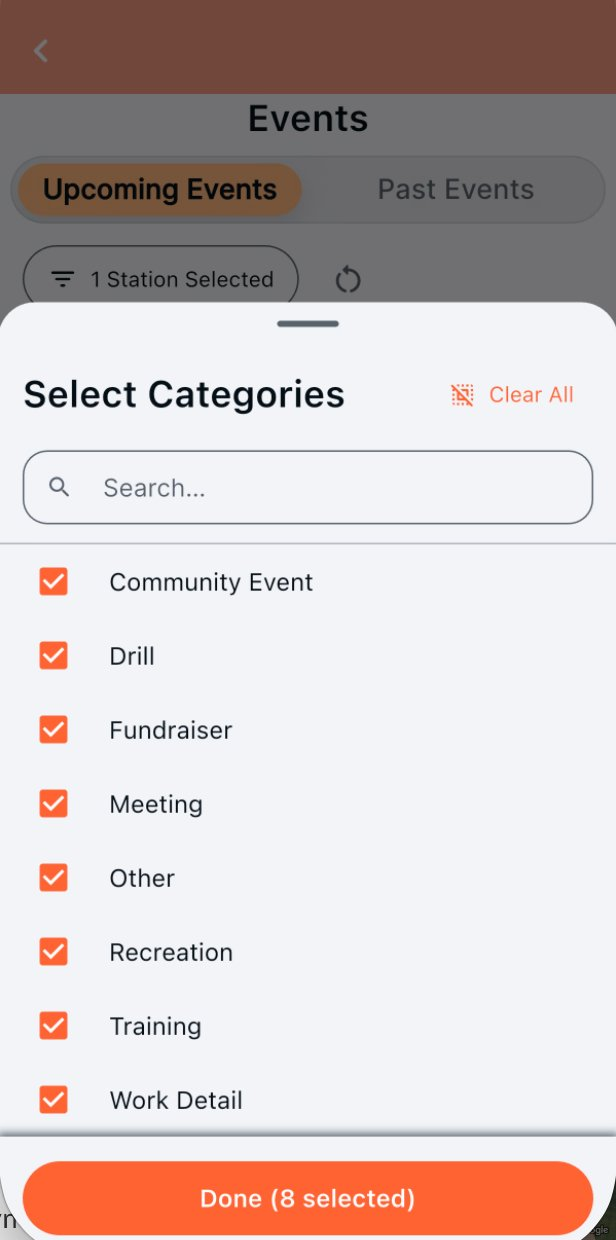
Categories are department specific. The default set covers Community Event, Drill, Fundraiser, Meeting, Other, Recreation, Training, and Work Detail. Your department admin can configure these.
Multi-select any combination to filter the events list.
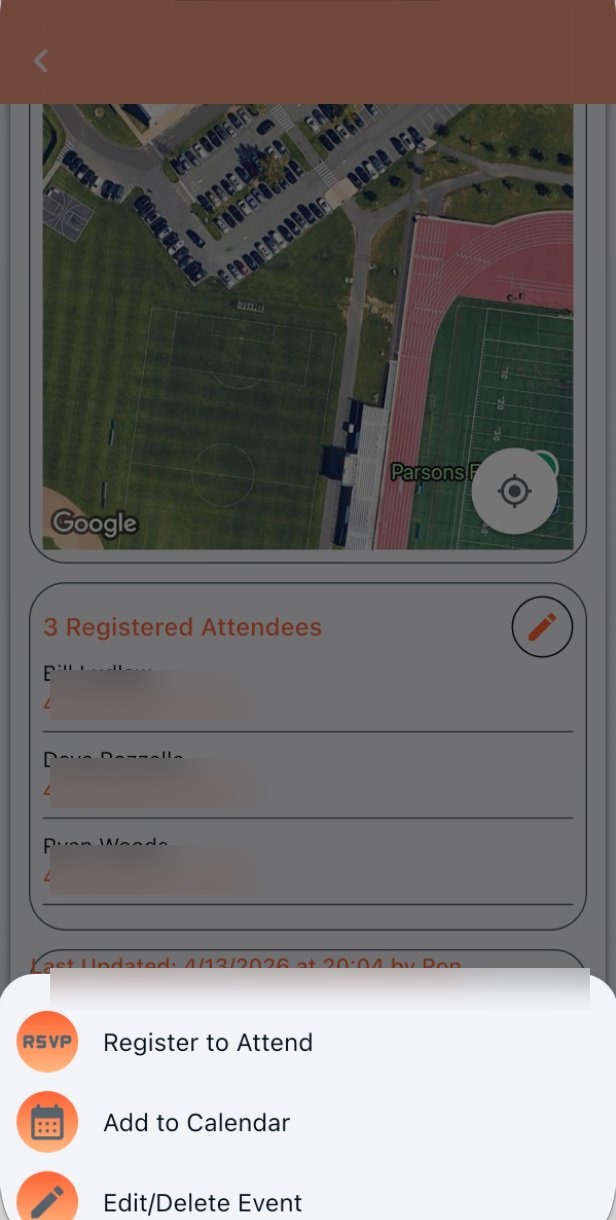
From the event detail page, tap the green action button to open the action sheet. Three options:
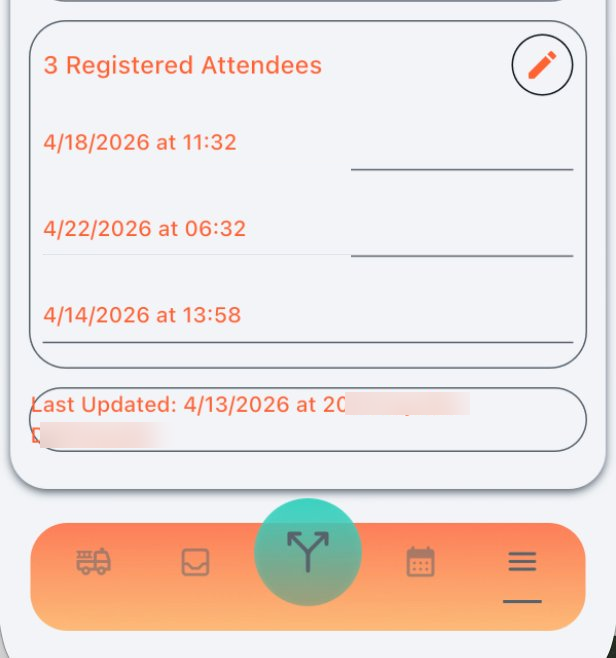
Each event tracks who has registered, with RSVP timestamps. The Last Updated line at the bottom is an audit record showing when and by whom the event was last edited. Names are blurred in this guide for privacy.
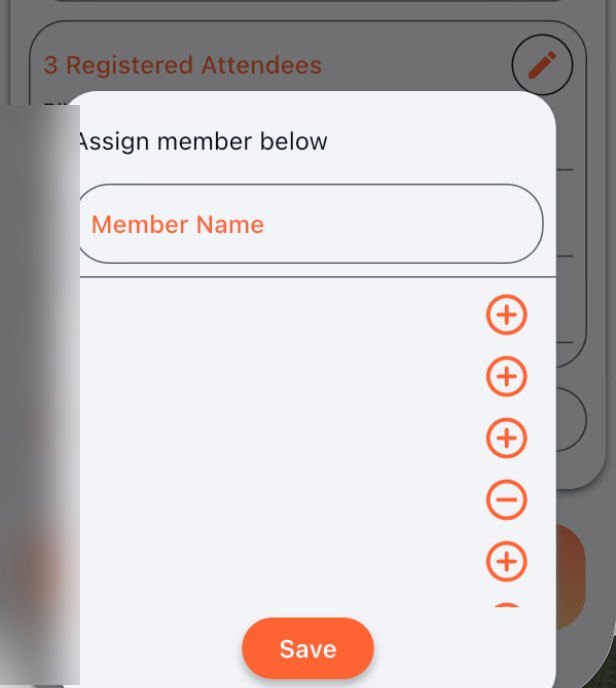
The pencil icon on the attendees panel is admin only. If you have event admin permissions, tap it to manually add or remove members. Useful for registering people who can't RSVP themselves, or correcting attendee lists after the fact.
You're set. Here's where to go if anything's not working as expected.
Notifications enabled · Location permission granted · Profile complete · Station assigned · Test alert received from admin.